Images and Video
When operating in Live mode, activate the Trigger to capture an image of the active screen.
When the Trigger is activated an image file set is saved to the microSD card.
The saved image set depends on the display mode.
| – | When using Split Screen mode, only the split screen image is saved along with the metadata file. |
| – | When using any display mode except Split Screen, three separate images are saved along with the metadata as listed below. |
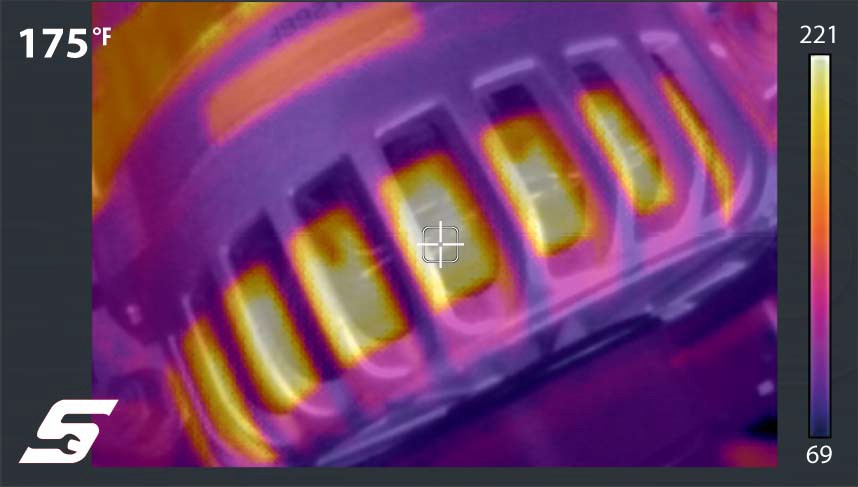
| ● | (T) Full thermal view |
| ● | (V) Visual light view |
| ● | (X) Opacity view |
| ● | (M) Text metadata file - Image meta data (e.g. Date, Emissivity setting, Object distance setting, Temperature:, Color palette) |
I
| – | If you are using the Snap-on Cloud, the saved images are uploaded to your Snap-on Cloud account at ALTUSDRIVE.com when Wi-Fi is connected. The metadata TXT file is not uploaded, however metadata is displayed with each image set. |
| – | Approximately 15000 images or 225 video files can be saved to the microSD card. The overall total of images and videos that can be saved will vary and depends on number and size of the saved files. |
When an image is captured, the thermal imager automatically assigns a system generated ID (name) to each file the saved file set. The following describes the file ID naming protocol:
|
Media Type |
Unique ID Number |
Type |
File Format |
|
|
IMG |
0153 |
X |
Indicates one of the following: Opacity View Split Screen View Picture-in-Picture View |
BMP (Bitmap) |
|
V |
Visual Light View |
|||
|
T |
Full Thermal View |
|||
|
M |
Text File |
TXT |
||
All files are named as shown in the table above, with the 4 digit numeral being the unique identifier (e.g. IMG0153V.BMP, IMG0153V.TXT ).
Video can be captured at anytime while in Live mode.
| 1. | To enter recording mode, press the N button once. |
A video mode indicator is displayed onscreen.
| 2. | To start recording, pull the trigger once. |
When video is being captured the indicator flashes.
Video recording automatically stops after 100 seconds.
| 3. | To stop recording, pull the trigger once again. |
When recording is stopped, the video file is automatically saved on the microSD card in the Gallery using a (MOVxxxV.AVI) file naming format.
| 4. | After the video is saved, you can continue operation as normal, save another video, or view the video saved on the microSD card in the Gallery, see Using the Gallery (Viewing / Deleting). |
When you save an image or video, it is stored in the Gallery on the microSD card.
| 1. | To open the Gallery, press the Menu  button. button. |
| 2. | Select the Gallery icon from the toolbar. |
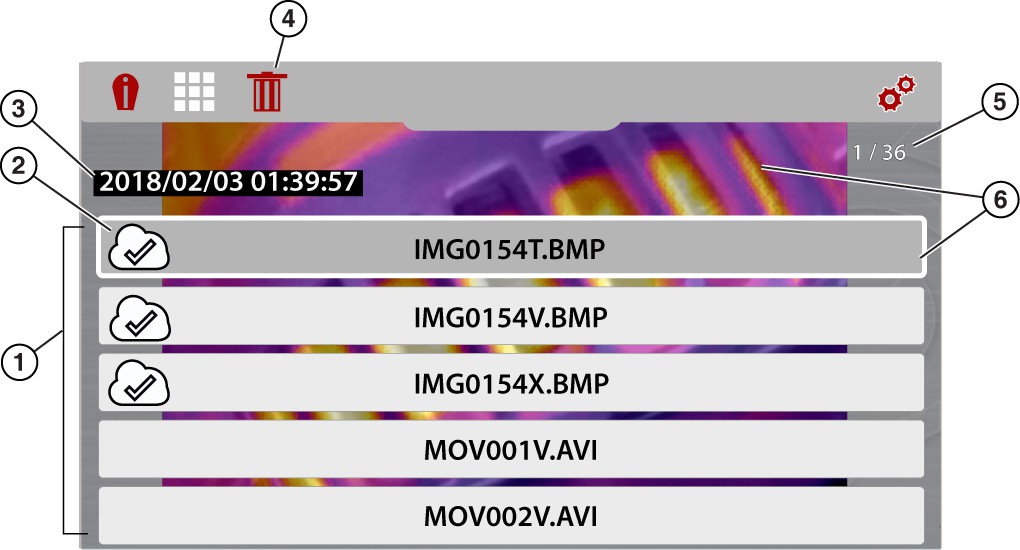
When the gallery opens, the a list is displayed with the most recently saved file on top of the list.
| 3. | Use the Up / Down control buttons to navigate through the Gallery list. |
A file is selected when a highlighted box appears around the selection. A selected image can be partially seen in the background, as you scroll through the image menu.
ImageGalleryScreen
| 1. | File Menu |
| 2. | File Upload Status Icon |
| 3. | File Date/Time |
| 4. | Delete Icon |
| 5. | Current Image of Total indicator (e.g. 1 of 36) |
| 6. | Selected File (displays in background) |
A Cloud file upload status icon is used on the file name selection to indicate the current status of the file upload to the Snap-on Cloud.
|
File Upload Status Icons |
|
|
File Not Uploaded or Waiting to be Uploaded |
|
|
File Upload In Process |
|
|
File Upload Complete |
|
| 1. | Open the Gallery, see Opening the Gallery and Selecting a File. |
| 2. | Select the file to be deleted from the Gallery list. |
| 3. | Select the Delete (trash can icon)  from the toolbar. from the toolbar. |
| 4. | Press the Y button to delete the file. |
The Thermal Imager can be connected to a PC using the supplied USB cable. This allows you to transfer saved files to the PC.
| – | When the Thermal Imager is connected by USB cable to a PC, saving and viewing files is disabled. If the screen capture trigger is pulled, or the gallery icon is selected while the USB cable is connected to a PC, an error message is displayed. To resume saving images, disconnect the USB cable from the PC. |
| – | Removing the microSD card and using a memory card reader connected to your PC, is an alternate way to transfer images to your PC. |
| 1. | Open the protective cover on top of the Thermal Imager, and connect the USB cable to the USB jack. |
| 2. | Turn the Thermal Imager on. |
| 3. | With your PC turned on, connect the USB cable to your PC. |
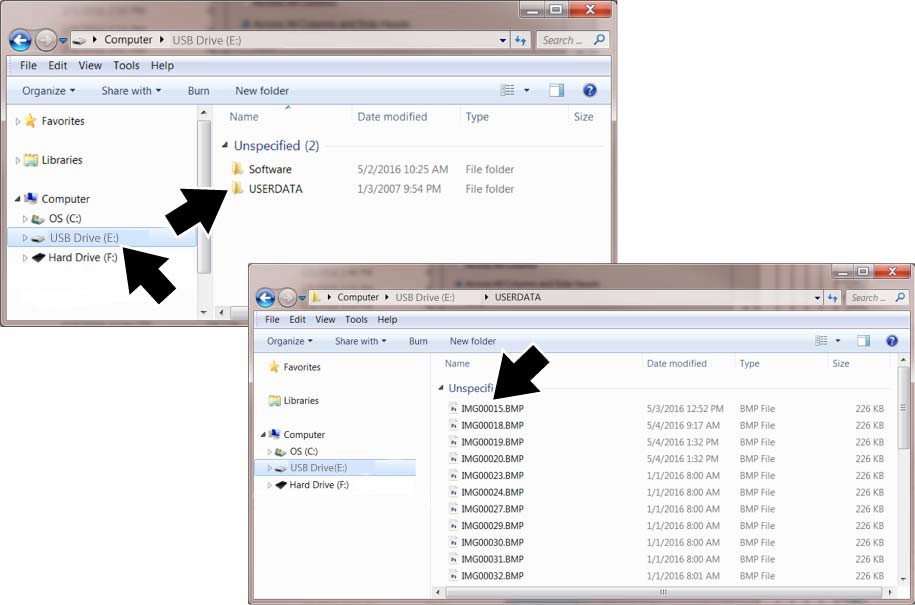
| 4. | The Thermal Imager will be recognized by your PC as an external storage device (e.g. USB Drive (E:), USB Drive (H:), etc.). |
| 5. | Using the standard Windows applications on your PC (e.g. Windows Explorer or Computer), select your saved files from the “USERDATA” folder on the Thermal Imager microSD card. |
| 6. | Select a file (image/BMP , video/AVI, text/TXT) to open it, or copy or move files from the Thermal Imager to your PC. |
| 7. | When finished, (if required) perform any Windows procedures to “Safely Remove Hardware or Eject Media” to stop communication with the Thermal Imager. |
| 8. | Disconnect the USB cable from the PC, and the Thermal Imager. |
| 9. | Close the protective cover. |


